Extracting Subtitles from MKV Files

I’m not certain whether it’s linked to being an expat living in the Netherlands trying to understand what’s being said on their television channels, or just that my hearing isn’t is what it used to be, but it’s quite rare for me to watch anything without subtitles, whatever the language…. Often though, it’s the case that my TV is not able to use the subtitles embedded within an MKV file. Instead, I need to extract the subtitles data stream to a separate SRT file, and ensure the filename matches the MKV one, apart from the suffic.

This post follows on from one of a couple of weeks ago about getting MKV file information, and goes into how we can also extract the subtitles for one of these files.

The script is posted below. As you’ll probably already have noticed, it’s quite similar to the cmdlet from the earlier post. We’re accepting ‘FullName’ as an alias of the Path, and we’re constructing the command to be executed dynamically by combining the command parameters with the values that have been passed in. Also, the filename of the SRT file is matched to the original MKV file so we don’t need to change it after.

function Get-MKVSubtitles            
{            
    [CmdletBinding()]            
                
    Param            
    (            
        [Parameter(Mandatory = $True, ValueFromPipelineByPropertyName = $True)][Alias('FullName')] [string] $Path,            
        [Parameter(Mandatory = $True, ValueFromPipelineByPropertyName = $True)] [string] $Track                   
    )            
                
    Process{                   
        $Destination = ($Path.Substring(0,$Path.Length - 4)) + '.srt'            
        $command = "D:\portable\mkvtoolnix\mkvextract.exe tracks -q `"$Path`" $Track`:`"$Destination`""            
        Write-Verbose -Message "Path        : $Path"            
        Write-Verbose -Message "Track       : $Track"            
        Write-Verbose -Message "Destination : $Destination"            
        Write-Verbose -Message "Command     : $command"            
        Invoke-Expression -Command $command                     
    }            
}

If we have one file, we can use the cmdlet like this:

Get-MKVSubtitles -Path C:\Data\Videos\MyMovie.mkv -Track 0

PowerShell’s pipeline functionality comes into great effect if we have multiple MKV files with subtitles in a directory.  We could use a combination of Get-ChildItem, and Get-MKVTrackInfo with Get-MKVSubtitles :

Get-ChildItem -Filter *.mkv |
Get-MKVTrackInfo |
Where-Object -Property TrackType -EQ -Value 'Subtitles' |
Get-MKVSubtitles

If your MKV files were spread over a series of sub-directories, you could even add the -recurse parameter to Get-ChildItem, since FullName is passed through the pipeline to Get-MKVInfo.

Saving all functions in a module to separate files

I like to keep functions in separate files. I figured I’d have a go at extracting all the functions from my recently downloaded PowerShellCookbook module into separate files. I also wanted to make sure that the filenames generated would match the function names.

Here’s what I came up with. It’s basically a one liner ‘steroided‘ (take a look if you don’t know what I mean) to make it more readable. The only caveat really is that the module needs to be loaded into memory, as it uses the Function PS Provider to obtain the information.

If you wanted to, you could completely omit the Where-Object filter to dump all currently loaded functions into separate files.

#requires -Version 3
Get-ChildItem -Path Function:\  |
Where-Object -Property ModuleName -EQ -Value ‘PowerShellCookbook’ |
Select-Object -Property Name, ScriptBlock |
ForEach-Object -Process {
Add-Content -Path “d:\temp\$($psitem.Name).ps1″ -Value $psitem.ScriptBlock
}

Translating Languages with PowerShell

When you come from another country, it can be difficult living in the Netherlands sometimes. Dutch is not as difficult as you’ll hear from others, but sometimes you want to make sure the sentence you’ve read means what you think. Mistakes can be embarrassing, expensive, or something that falls into the general I-should-have-checked-that-first category. Trust me, I know……..

Normally for translation I’ll use the Google Translate web site. The translation is not always 100% accurate, but usually enough to understand things. And it’s quick.

For automation, Google provide a web services API, but this is a paid-for service.  Fortunately, Microsoft provide a free translation web service, not costing you anything unless you plan to translate more than 1,000,000 characters a month.

There are some steps that we need to do to be able to use Microsoft’s translation web service before we can begin scripting.

Sign up for the Microsoft Translator Web Service

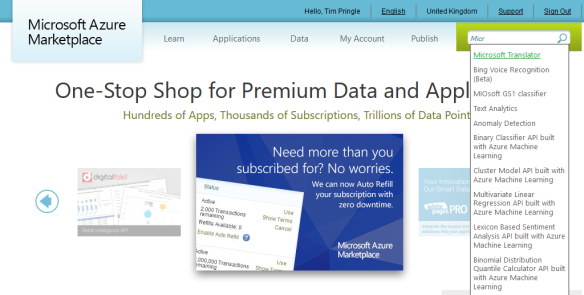
1.  Visit the Microsoft Azure Marketplace at https://datamarket.azure.com/home/

Azure Marketplace Front
2
.  Click Sign In at the top right of the screen.

Azure Marketplace Logon
3. Sign-in with your Microsoft account credentials (create a Microsoft account if you do not have one before continuing).

microsofttranslatorsearch4. Begin to type Microsoft Translator into the search box at the top right.
5. In the search list, click Microsoft Translator.

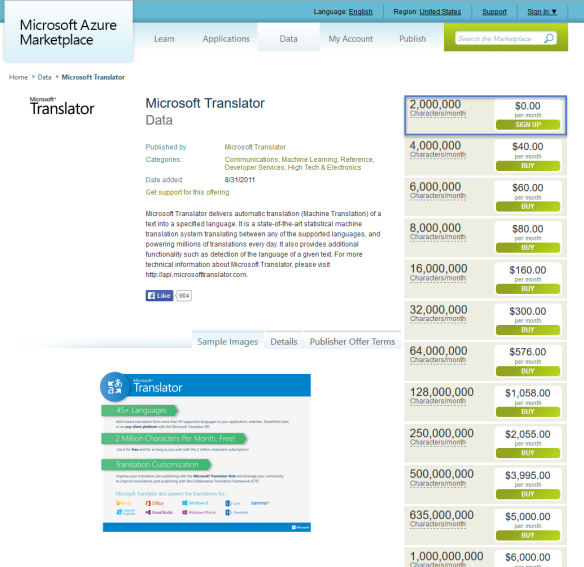
Microsoft Azure Marketplace
6. Click Sign Up on the free option.

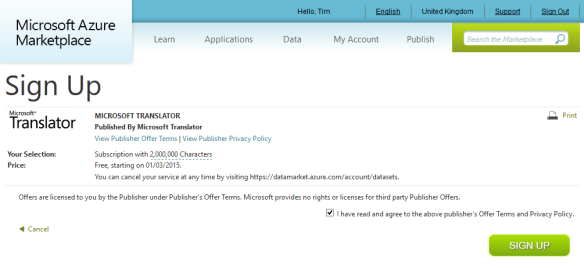
signup
7. Select the I have read and agree to the above publisher’s Offer Terms and Privacy Policy check box.
8. Click Sign Up.

Register your Application

Now it’s time to register our application which will be use the Microsoft Translator web service.
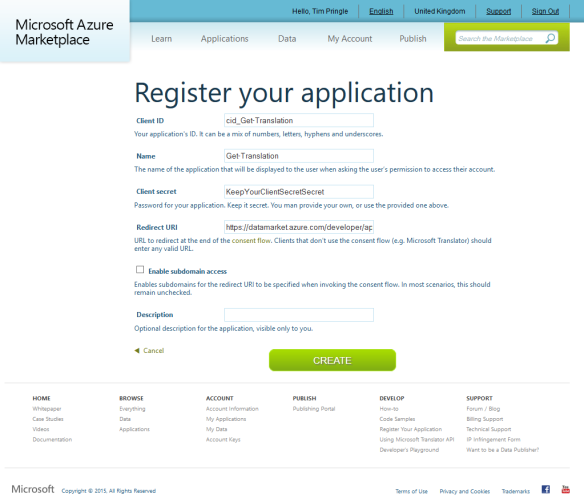
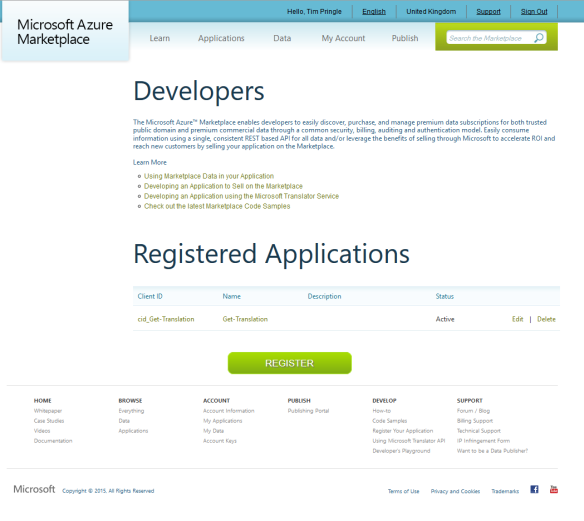
Register your application

1. In the Client ID box, type a name that you wish you be associated with your application. This can be a mixture of numbers, letters, hyphens and underscores.
2. In the Name box, type a suitable name for your application. This property is not used in the cmdlet we will be writing.
3. In the Client secret box, type a password for the application. Keep this information secure.
4. In the Redirect URI box, type any valid URL. This property is also not used in our script.
5. In the Description box, type a description if you wish for later reference.
6. Click CREATE

RegistedApplications
7. Select Sign Out.
8. Close your browser window.

Script the Cmdlet

With the previous steps complete, we can start to script the cmdlet. This cmdlet borrows code from MSDN, so I’d recommend visiting the Microsoft Translator pages for more information on the web service and examples.

The cmdlet uses input parameters of Text for the string to be converted, and From and To ones, which you use to indicate the original language the string is in, and the one you want it translated to. You can find the most recent list of supported languages at the Translator Language Codes webpage, also on MSDN.

I’ve enclosed an example below, together with the type of result you should expect.


 Get-Translate -Text 'I speak English. I learn from a book' -From en -To nl 

SpeakEnglish


function Get-Translation
{
    [CmdletBinding()]
    
    Param
    (
        [Parameter(Mandatory = $True, ValueFromPipelineByPropertyName = $True,Position = 0)] [string] $Text,
        [Parameter(Mandatory = $False, ValueFromPipelineByPropertyName = $True)] [string] $From = 'nl',
        [Parameter(Mandatory = $False, ValueFromPipelineByPropertyName = $True)] [string] $To = 'en'
    )
    
    Begin {
        Add-Type -AssemblyName System.Web
        $ClientID = 'myclientid'
        $secret = 'mysecret'
        $encodedURL = [System.Web.HttpUtility]::UrlEncode($ClientID)
        $encodedSecret = [System.Web.HttpUtility]::UrlEncode($secret)
        $Uri = 'https://datamarket.accesscontrol.windows.net/v2/OAuth2-13'
        $Body = "grant_type=client_credentials&client_id=$encodedURL&client_secret=$encodedSecret&scope=http://api.microsofttranslator.com"
        $ContentType = 'application/x-www-form-urlencoded'
        $AccessToken = Invoke-RestMethod -Uri $Uri -Body $Body -ContentType $ContentType -Method Post
        $HeaderValue = 'Bearer ' + $AccessToken.access_token
    }
    
    Process
    {
        [string] $textEncoded = [System.Web.HttpUtility]::UrlEncode($Text)
        [string] $Uri = 'http://api.microsofttranslator.com/v2/Http.svc/Translate?text=' + $Text + '&from=' + $From + '&to=' + $To

        $result = Invoke-RestMethod -Uri $Uri -Headers @{
            Authorization = $HeaderValue
        } 
    
        $hash = @{
            OriginalText   = $Text
            TranslatedText = $result.string.'#text'
            From           = $From
            To             = $To
        }
       
        New-Object -TypeName PsObject -Property $hash
    }
}

URL Shortening

Love it or loathe it, URL shortening has been with us a while now and can certainly be handy. TinyURL are one such company to offer this service. Nicely for us, we do not need to register in order to use their API, and yet nicer still is that we can use it simply by entering a standard format of URL.

Before we see how we can use PowerShell to automate this process, let’s take a look at the format of URL that we need to use with TinyURL.

http://tinyurl.com/api-create.php?url=targetaddress

Where targetaddress refers to the URL that you wish to shorten.

And that’s it.

Let’s say we wanted share a link containing information about this years PowerShell Summit Europe event in Stockholm. The full length URL for this is :

http://powershell.org/wp/community-events/summit/powershell-summit-europe-2015/

If we wanted to get the TinyURL equivalent of this, we’d use the following URL, pasting it into the address bar of our browser.

http://tinyurl.com/api-create.php?url=http://powershell.org/wp/community-events/summit/powershell-summit-europe-2015/

TinyURLExample

For making this happen via PowerShell, Invoke-WebRequest is our friend. All we need to do is provide the required address via the Uri parameter, and the Content property of the returned HtmlWebResponseObject will contain its shortened equivalent.

So for the case of the above we’d be using a command (note the pipeline symbol) of the type :

Invoke-WebRequest -Uri 'http://tinyurl.com/api-create.php?url=http://powershell.org/wp/community-events/summit/powershell-summit-europe-2015/' |
Select-Object -ExpandProperty Content

And can expect to get :

InvokeWebRequest

I’ve put together a cmdlet called Get-TinyURL for doing this. At its simplest, you can run it with the Uri parameter, and it will return a PSObject containing the original full address and its shortened equivalent.

Get-TinyURL -Uri 'http://powershell.org/wp/community-events/summit/powershell-summit-europe-2015/'

GetTinyURL

It’s also been bulked out a bit to give some extra functionality, such as being able to read from and write to the clipboard if we want. With both options enabled, we can copy a full address into the clipboard, run the cmdlet, and automatically have the shortened URL available for pasting wherever we want it next.

pseufull
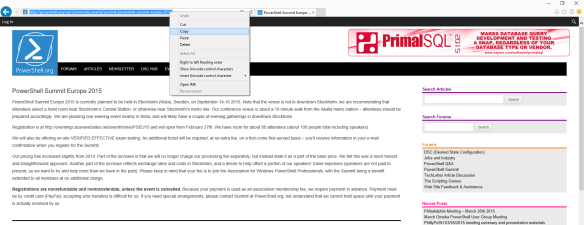
Navigate to desired URL and copy it to the clipboard

Get-TinyURL -ReadClipboard -WriteClipboard

GetTinyClipboard
Run the required command

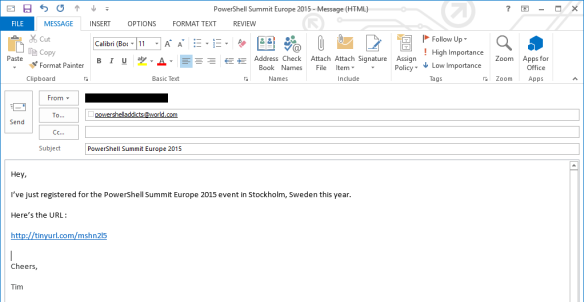
pseuemail Paste where required

The code used is listed below, and will also be posted on GitHub in due course.

function Get-TinyURL
{
    [CmdletBinding()]
    
    Param
    (
        [Parameter(Mandatory = $True, ValueFromPipelineByPropertyName = $True,ParameterSetName = 'URI')] [string] $Uri,
        [Parameter(Mandatory = $True, ValueFromPipelineByPropertyName = $True,ParameterSetName = 'ReadClipboard')] [switch] $ReadClipboard,
        [Parameter(Mandatory = $False, ValueFromPipelineByPropertyName = $True)] [switch] $WriteClipboard = $False

    )
    
    Process
    {

        If ($ReadClipboard -or $WriteClipboard) 
        {
            $null = Add-Type -AssemblyName System.Windows.Forms
        }

        If ($ReadClipboard) 
        {
            $Uri = [system.windows.forms.clipboard]::GetData('System.String')
        }
        

        $tinyURL = Invoke-WebRequest -Uri "http://tinyurl.com/api-create.php?url=$Uri" | 
        Select-Object -ExpandProperty Content


        If ($WriteClipboard) 
        {
            [system.windows.forms.clipboard]::SetData('System.String',$tinyURL)
        }

        $hash = @{
            Uri     = $Uri
            TinyURL = $tinyURL
        }
        
        New-Object -TypeName PsObject -Property $hash
    }
}